
Battery, Alternator, or Starter: Diagnosing Why Your Car Won't Start

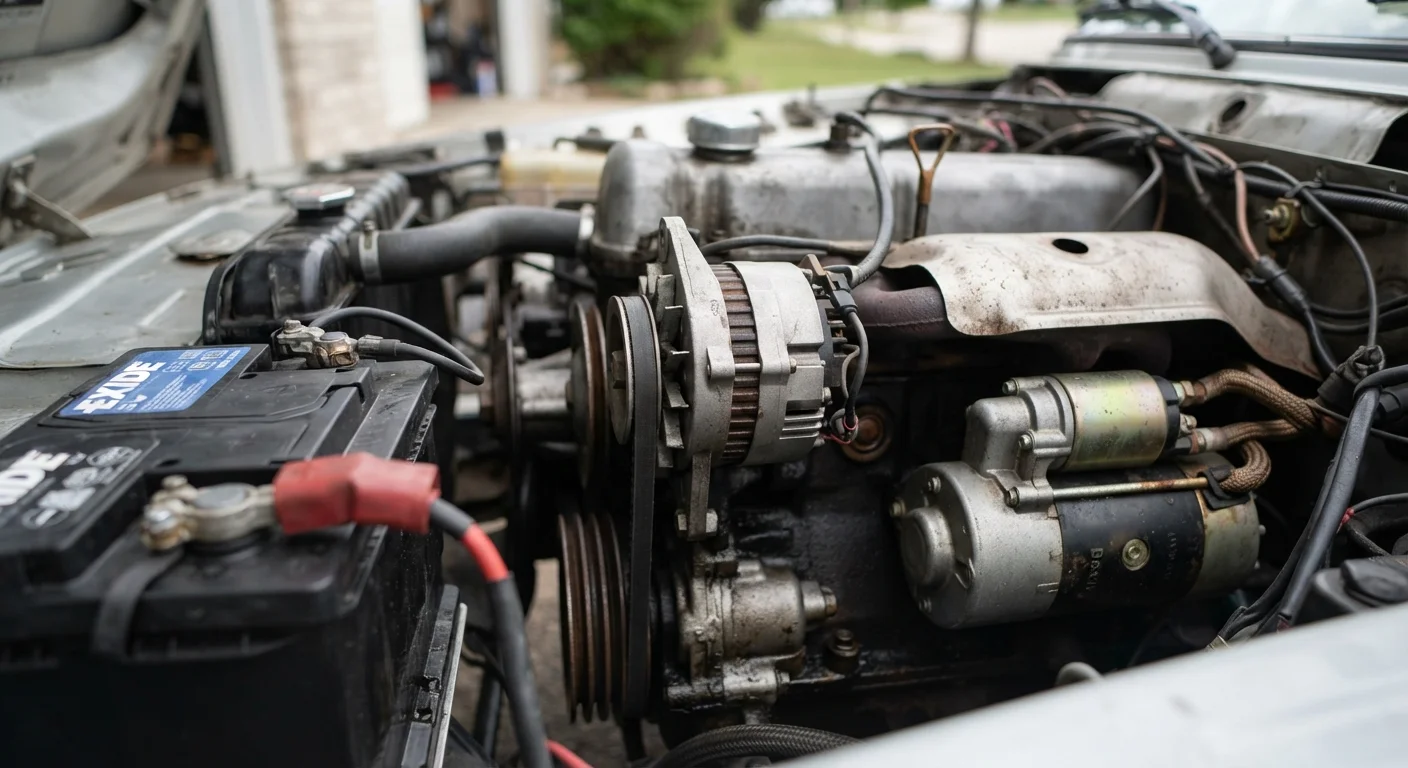
Photo: InsightsBlock.com | Access Information With Ease editorial
Key Takeaways
- A completely dead, silent car usually points to the battery or its connections first.
- A clicking sound when turning the key is a strong indicator of a failing starter motor.
- Dashboard warning lights and dim headlights can help distinguish battery from alternator failure.
- A multimeter gives you objective voltage readings to confirm your diagnosis before visiting a shop.
- Jump-starting a car that restarts fine but dies again points toward alternator failure, not battery.
Why These Three Components Cause Most No-Start Problems
When a car refuses to start, the electrical system is responsible the vast majority of the time. Three components form the core of that system: the battery, which stores and delivers electrical energy; the alternator, which recharges the battery while the engine runs; and the starter motor, which uses that stored energy to physically turn the engine over.
Each failure mode produces distinct symptoms, and understanding the differences lets you gather meaningful information before spending money on diagnostics or repairs. A few minutes of careful observation - and one inexpensive tool - can often narrow the problem down to a single component.
Multimeter
Measures battery voltage and alternator output to confirm electrical health with precise readings.
Jumper cables or jump starter pack
Allows you to jump-start the vehicle as part of diagnosing whether the battery or alternator is at fault.
Insulated work gloves
Protects your hands when handling battery terminals and electrical components.
Flashlight or headlamp
Improves visibility when inspecting the engine bay, especially in low-light conditions.
Gather your tools and review the prerequisites below before working through the diagnostic steps.
What you will need
Step-by-Step Diagnosis
Work through each step in order. Earlier steps inform later ones, and skipping ahead risks misdiagnosis. Most drivers can complete this process in a driveway or parking lot without any specialized mechanical training.
Safety First When Inspecting Your Engine
Observe what happens when you turn the key
The first clue comes from your car's response - or lack of one - when you attempt to start it. Pay close attention before touching anything under the hood:
- Complete silence: Nothing happens at all. This suggests a dead battery, a disconnected battery cable, or a blown fuse.
- Single loud click: The starter solenoid is engaging but the starter motor isn't turning. This commonly indicates a faulty starter.
- Rapid clicking (rat-a-tat sound): The starter is trying to engage repeatedly but lacks enough power - a classic symptom of a low or discharged battery.
- Engine cranks slowly but won't fire: The motor is turning over sluggishly. This also points toward a weak battery.
- Engine cranks normally but won't start: The electrical system is likely fine - look at fuel, spark, or another system entirely.
Check the battery terminals and cables
Before assuming a component has failed, inspect the battery visually. Corroded or loose terminals can mimic a dead battery completely.
- Open the hood and locate the battery.
- Look for white, blue, or greenish buildup around the terminal posts - this is corrosion and it impedes electrical flow.
- Grip each cable connector and check that it does not move or wiggle on the post. Loose connections are a surprisingly common cause of no-start problems.
- Inspect the cables themselves for visible cracks, fraying, or burn marks.
If you find heavy corrosion, a mechanic can clean the terminals as a low-cost first step before replacing any parts.
Test battery voltage with a multimeter
Set your multimeter to DC voltage at the 20V range. Touch the red probe to the positive battery terminal (+) and the black probe to the negative terminal (−).
- 12.6 V or above: Battery is fully charged and likely healthy.
- 12.0 V - 12.5 V: Battery is partially discharged - it may start the car in mild temperatures but is weakened.
- Below 12.0 V: Battery is significantly discharged or failing and likely the reason for the no-start.
A healthy battery at rest (engine off, no accessories running) should read close to 12.6 V. Readings well below this suggest the battery cannot deliver adequate cranking power.
Attempt a jump-start and observe the result
Jump-starting your vehicle tells you a great deal about which component is actually failing:
- Car starts and runs fine without issue: The battery was simply discharged. It may need recharging or replacement depending on its age and the reason it drained.
- Car starts, runs for a while, then dies again: This is a strong indicator of alternator failure. The battery was able to start the car but the alternator is not recharging it while driving.
- Car will not start even with a jump: The starter motor is often the culprit, or the battery has failed so completely it cannot hold even a jumped charge.
Test alternator output while the engine runs
If the car starts successfully, you can test the alternator with the same multimeter. With the engine running at idle, place the probes on the battery terminals again:
- 13.8 V - 14.8 V: Alternator is charging correctly.
- Below 13.5 V: Alternator output is weak or failing - the battery will slowly drain while you drive.
- Above 15.0 V: Alternator may be overcharging, which can damage the battery and other electronics.
You can also turn on major electrical loads (headlights, climate control, rear defroster) and watch the voltage. A healthy alternator maintains output above 13.5 V under load. A failing one will drop noticeably.
Interpret your findings and decide next steps
Use the results of your observations and tests to determine where to direct your repairs:
- Battery fault confirmed:
- If resting voltage is low and the car responded with slow cranking or rapid clicking, the battery likely needs recharging or replacement. Batteries typically last 3-5 years depending on climate and usage.
- Alternator fault confirmed:
- If the car starts with a jump but dies, or alternator voltage is below 13.5 V at idle, have the alternator inspected by a qualified mechanic. Alternator replacement is generally not a DIY task for most drivers.
- Starter fault suspected:
- If battery voltage is good, a jump makes no difference, and you heard a single loud click, the starter motor is the likely cause. Starter replacement typically requires a mechanic.
For any component replacement beyond basic battery swaps, consulting a qualified automotive technician is advisable to ensure proper diagnosis and safe installation.
Don't Ignore a Repeatedly Dead Battery
Keep a Basic Diagnostic Tool in Your Glovebox
When to Stop Diagnosing and Call a Professional
Self-diagnosis has real limits. If your testing produces conflicting results, if you notice signs of electrical damage (burning smell, melted insulation, visible sparks), or if the car has repeated no-start events without a clear cause, stop and bring the vehicle to a qualified mechanic or auto electrician.
Modern vehicles increasingly use sophisticated battery management systems and smart alternators that interact with the engine control unit. In these cases, a professional scan tool may be required to accurately identify the root cause - something a basic multimeter cannot do.
Catching a failing component early almost always costs less than dealing with a breakdown or damage caused by continuing to drive on a compromised electrical system. Use your diagnostic findings to have a more informed conversation with your service technician, which can save both time and unnecessary parts costs.
The content provided on our blog site traverses numerous categories, offering readers valuable and practical information. Readers can use the editorial team’s research and data to gain more insights into their topics of interest. However, they are requested not to treat the articles as conclusive. The website team cannot be held responsible for differences in data or inaccuracies found across other platforms. Please also note that the site might also miss out on various schemes and offers available that the readers may find more beneficial than the ones we cover.