
Insulating an Attic: The Decisions That Shape Your Energy Efficiency Outcomes

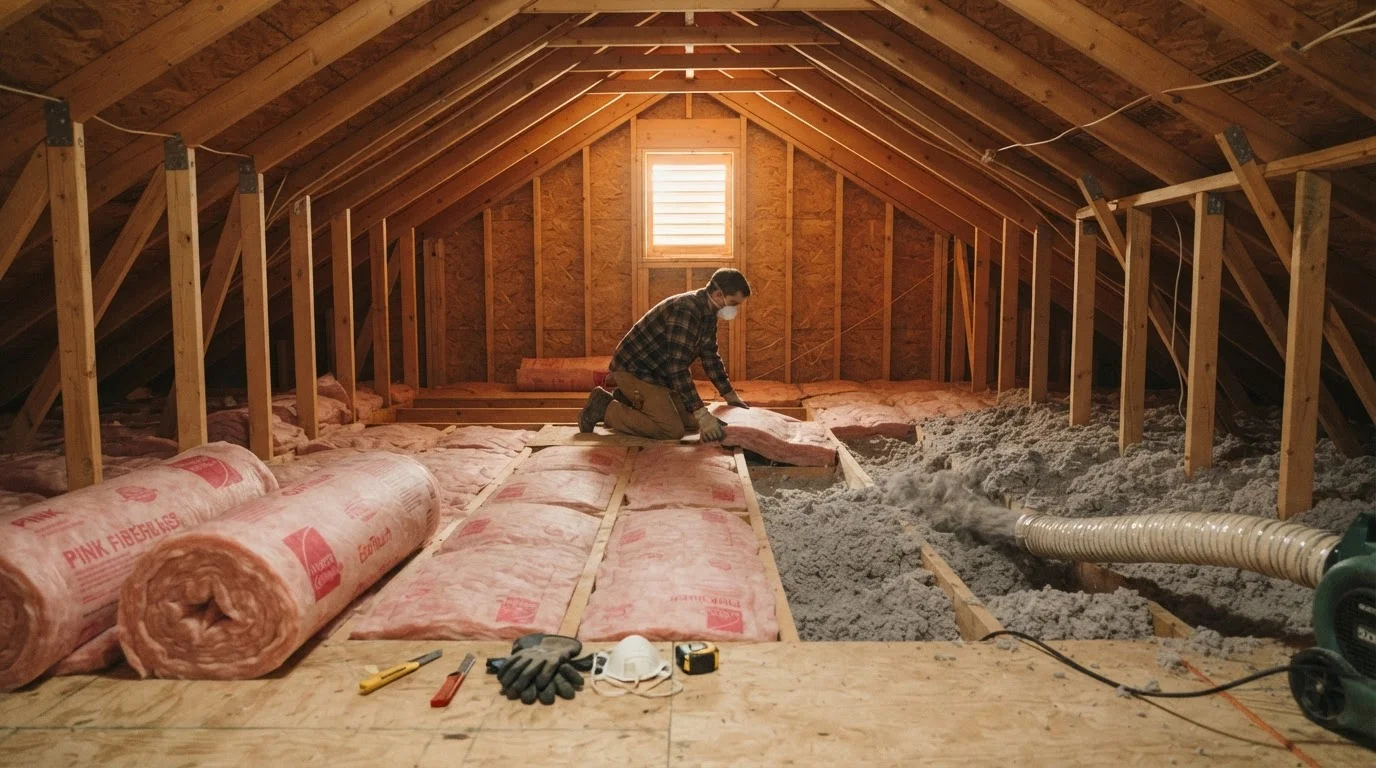
Photo: InsightsBlock.com | Access Information With Ease editorial
Key Takeaways
- R-value measures thermal resistance but does not account for air leakage, which can undermine even well-insulated attics.
- Air sealing before adding insulation is widely considered the single most impactful step in attic energy performance.
- Insulation type - batts, blown-in, or spray foam - should match your attic's geometry and moisture conditions.
- Most US climate zones call for R-38 to R-60 in attic floors; verify requirements for your specific zone.
- Certain attic work involving electrical, structural, or gas systems requires a licensed professional and may require permits.
Why Attic Insulation Has Such a Large Impact
Heat moves toward cold - that simple physics principle explains why your attic matters so much. In winter, heat generated inside your home rises and escapes through the roof. In summer, the attic absorbs intense solar heat and radiates it downward into living spaces. An under-insulated attic accelerates both processes, forcing your heating and cooling system to work harder.
The US Department of Energy estimates that heating and cooling account for roughly half of a typical home's energy consumption, and the attic is one of the highest-leverage areas to address. Unlike walls, which are difficult and expensive to re-insulate without a major renovation, attics are typically accessible and improvable without demolition.
That accessibility is why attic insulation upgrades are consistently recommended before other envelope improvements. But the decisions you make - material, depth, placement, and prep work - determine how much benefit you actually see.
~50%
Share of home energy use from heating and cooling
According to the US Department of Energy, space conditioning typically represents the largest single portion of residential energy consumption.
R-38 to R-60
Recommended attic R-value for most US climate zones
The Department of Energy's zone-by-zone guidelines indicate this range covers the majority of the contiguous United States.
25-30%
Estimated heat loss through uninsulated or under-insulated attics
Building science research generally attributes a significant share of total envelope heat loss to the roof plane in typical residential construction.
Understanding R-Value and Why It's Not the Whole Story
R-value is a measure of thermal resistance - the higher the number, the more a material resists heat flow. For attics, the Department of Energy's recommendations vary by climate zone, but most of the contiguous US falls into ranges calling for R-38 to R-60 in attic floors. Colder climates (zones 6-8) generally warrant the higher end of that range.
However, as explored in detail in our complementary guide What R-Value Really Means, the number on the bag or label only tells part of the story. Insulation performs at its rated R-value only when air is not moving through or around it. Gaps, bypasses, and air leaks can dramatically reduce effective performance - even in an attic that appears well-insulated on paper.
This is why whole-system thinking matters. R-value is your target, but air sealing is what lets that target actually be reached.
Prioritize air sealing at penetrations - especially around top plates, plumbing stacks, and recessed lighting - before adding any new insulation depth. Insulation laid over unsealed bypasses provides far less real-world benefit than its R-value implies.
If you're adding blown-in insulation yourself, use depth markers (stakes or rulers) placed every few feet across the attic floor before you start blowing. This prevents uneven coverage and helps you hit your target depth consistently.
Choosing an Insulation Type
Three insulation types dominate residential attic applications, each with different installation characteristics, cost profiles, and suitability factors.
Fiberglass Batts
Batts are pre-cut rolls fitted between joists. They're among the more accessible materials for DIY installation in open, unobstructed attics with standard joist spacing. Their limitations emerge in irregular spaces - around pipes, wiring, and HVAC equipment - where gaps are easy to leave unintentionally.
Blown-In (Loose-Fill) Insulation
Blown-in cellulose or fiberglass fills irregular spaces more thoroughly than batts and can be layered to precise depths. Cellulose, made primarily from recycled paper, is treated with fire retardants and offers good coverage. Blown-in insulation typically requires renting or borrowing a blower machine, which most suppliers provide with material purchase. This approach is well-suited to attics where air sealing has already been completed at the floor level.
Spray Polyurethane Foam (SPF)
Spray foam - particularly closed-cell varieties - provides both insulation and air sealing in a single application. It is typically applied to the underside of roof decking rather than the attic floor, creating an unvented, conditioned attic. This approach is more expensive and almost always requires professional installation due to safety and application requirements. It's particularly useful when HVAC equipment or ductwork is located in the attic, since conditioning that space can significantly reduce duct losses.
Air Sealing: The Step Most Homeowners Skip
Before adding any insulation, air sealing the attic floor is the most impactful preparatory step you can take. Attic floors contain numerous penetrations - recessed lighting, plumbing stacks, wiring, top plates, HVAC chases - and each one is a potential conduit for conditioned air to escape (or infiltrate).
The process involves locating these bypasses and sealing them with appropriate materials: canned expanding foam for small gaps around pipes and wires, rigid foam board or drywall for large openings (such as dropped soffits above kitchen cabinets), and caulk for thin cracks at wall top plates. This step is performed before blowing or laying new insulation on top, since it requires visual access to the floor.
Non-IC-Rated Recessed Lights Are a Fire Risk
Homes built before the late 1980s may have recessed lights that are not rated for insulation contact (IC-rated). Covering non-IC-rated fixtures with insulation is a fire hazard. These fixtures must either be replaced with IC-rated versions or sealed within an appropriate air barrier box before insulating over them. When in doubt, consult a licensed electrician.
Air sealing is unglamorous, time-consuming work - but energy auditors and building scientists consistently identify it as the single step with the greatest impact on real-world performance outcomes.
Ventilation, Moisture, and Code Considerations
Proper attic ventilation prevents moisture accumulation and protects roof sheathing. In a conventionally vented attic (insulation on the floor, open air space above), ventilation is typically provided through a combination of soffit vents at the eaves and ridge vents at the peak. Insulation must not block soffit vents - baffles (also called rafter vents or insulation baffles) are installed between rafters to maintain the airway before blown-in insulation is added.
Moisture is a legitimate concern, particularly in mixed-humid climates. Adding insulation without addressing existing moisture intrusion from roof leaks, plumbing, or condensation can trap moisture and accelerate wood rot. Inspect the attic thoroughly before any insulation work; address any moisture sources first.
Permits may be required for certain attic work, particularly when spray foam is applied to the roof deck or when electrical components are modified. Requirements vary by jurisdiction. Check with your local building department before starting - not after.
If your attic includes older insulation containing vermiculite (associated with asbestos in some cases) or knob-and-tube wiring, stop and consult a licensed professional. These materials require specialist assessment before any additional work proceeds. The same caution applies if structural concerns are present. For a useful parallel on layering systems and how cumulative decisions shape overall performance, see our guide on layering for variable climates.
DIY vs. Professional Installation
Blown-in insulation on a well-prepared, air-sealed attic floor is considered one of the more accessible DIY projects for homeowners comfortable working in confined spaces. Fiberglass batts in standard joist bays are also manageable for DIY, provided attention is paid to coverage, vapor retarder requirements, and not compressing the material (compression reduces R-value).
Professional installation is strongly advisable - and often necessary - in these situations:
- Spray foam application of any kind
- Unvented (conditioned) attic assemblies
- Any work involving the electrical system, gas lines, or structural elements
- Attics with existing hazardous materials (asbestos, knob-and-tube wiring)
- Homes requiring permits for the scope of work planned
A professional energy auditor can also perform a blower door test - a diagnostic that pressurizes the home and identifies air leakage locations - before and after the project. This gives you an objective measure of improvement rather than relying on estimated R-values alone.
Whether you tackle insulation yourself or hire a contractor, the decisions you make about sequencing (seal first, then insulate), material selection, and depth will shape the actual energy performance your home achieves. No single choice determines success; the combination does.
This article is for general informational and educational purposes only. It does not constitute professional engineering, contracting, or safety advice. Always consult licensed professionals for work involving electrical systems, structural elements, or hazardous materials, and verify permit requirements with your local building authority before beginning any project.
The content provided on our blog site traverses numerous categories, offering readers valuable and practical information. Readers can use the editorial team’s research and data to gain more insights into their topics of interest. However, they are requested not to treat the articles as conclusive. The website team cannot be held responsible for differences in data or inaccuracies found across other platforms. Please also note that the site might also miss out on various schemes and offers available that the readers may find more beneficial than the ones we cover.